“Coding Your First Django Project in Visual Studio Code: A Beginner’s Guide”

Web Development with Django and Visual Studio Code: A Beginner’s Guide
Web development can be a daunting journey for beginners, but it doesn’t have to be. With the right tools and guidance, it can be a fun and rewarding experience. In this article, we’ll introduce you to the Django framework and Visual Studio Code, two powerful tools that can help you start building web applications today.
Django: A Python-Based Web Framework
Django is a Python-based web framework that is known for its simplicity and robustness. It provides a solid foundation for building web applications, so you can focus on your project’s features rather than the low-level details. Django can help you handle tasks like URL routing, database management, and user authentication with ease, making it a great choice for both beginners and experienced developers.
Visual Studio Code: Your Web Development Sidekick
Visual Studio Code, or VSCode for short, is a free and open-source code editor that is packed with features and extensions that make it ideal for web development. It is particularly user-friendly and customizable, and it offers an integrated terminal, version control support, and a rich ecosystem of extensions. We’ll show you how to set up a conducive development environment using VSCode later in this article.
Our Journey Ahead
In this article, we’ll cover the following topics:
- Setting up a Django project
- Creating a virtual environment
- Managing databases
- Essential web development concepts
By the end of this article, you’ll have a solid foundation in Django and VSCode, and you’ll be well on your way to building your own web applications.
Are you ready to start your web development journey?
Step 1: Install Python
If you haven’t already, download and install Python on your computer. You can get the latest Python version from the official website (https://www.python.org/downloads/).
Step 2: Install Visual Studio Code
If you don’t have Visual Studio Code installed, download it from the official website and install it.(https://code.visualstudio.com/).
Step 3: Install Visual Studio Code Extensions
Open VSCode and go to the Extensions tab (you can use the shortcut Ctrl+Shift+X or Cmd+Shift+X).
Search and install the following extension:
Search for “SQLite Viewer”and install the extension, which allows you to view and query SQLite databases directly from within VSCode.
Step 4: Create a Project Directory
Search To create a directory for your Django project on your PC, right-click in your desired location and select”New Folder,” then name it (e.g., “MyDjangoProject”).
Step 5: Open the Project Directory in VSCode
Launch VSCode and open your project directory by clicking on “File” -> “Open Folder” and selecting the folder you just created.

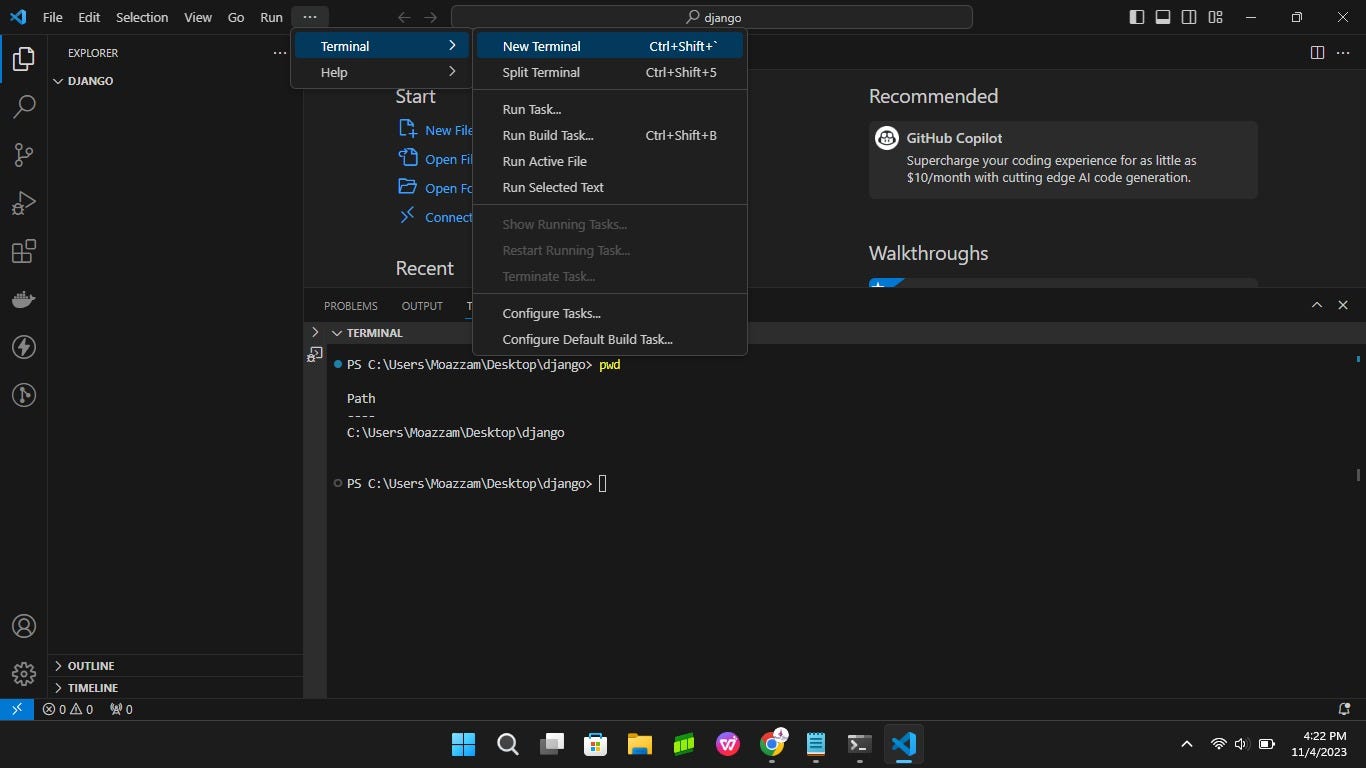
Step 6: Open a Terminal in VSCode
In VSCode, you can open a terminal by clicking “Terminal” -> “New Terminal.”
Step 7: Installing virtual environment
Open the terminal in Visual Studio Code Type and run the following command to install virtualenv using pip, which is a tool for managing Python packages.

Step 8: Create a Virtual Environment
In the terminal, navigate to yourproject directory, and run the following command to create a virtual environment.Replace myenv with your desired environment name.

Step 9: Activate the Virtual Environment
On Windows, activate the virtual environment with.

On macOS and Linux, use.

Step 10: Install Django
While your virtual environment is activated, install Django using pip.

Step 11: Create a Django Project
In the terminal, navigate toyour project directory (if you’re not already there) and run the followingcommand to create a new Django project. Replace myproject with your desired project name.

Step 12: Prepare the Database
After creating your Django project, run the following command to set up the initial database structure.

Step 13: Run the Development Server
To start the development server, run the following command.

Step 14: Access Your Local Development Server
Open a web browser and visit http://127.0.0.1:8000/ or http://localhost:8000/
You should see the Django welcome page.
Congratulations! You’ve set up a virtual environment and launched a local development server for your Django project using Visual Studio Code. You can now start building your Django web application.